How to update your own identity profile images as a Professional Plan user
As the owner of your own account, you can update the images on your identity profile by accessing your OneTapConnect account dashboard.
Your profile and About Me pictures can only be changed by updating the information that is saved to your user/identity profile information. For more information on how to update your profile picture, see How to add or update your profile picture.
How to upload or update other images on your identity profile:
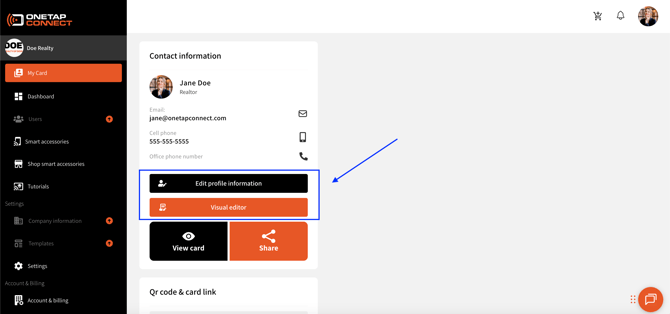
- Go to My Card, then click Visual Editor.
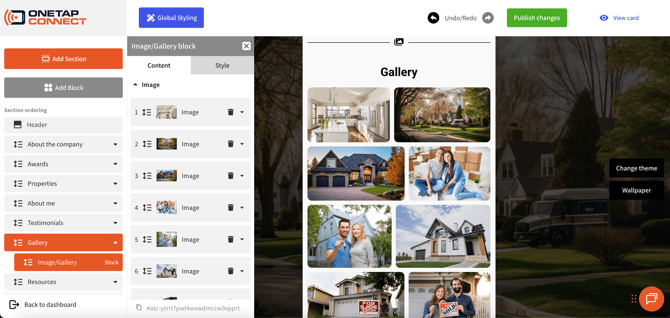
- Use the dropdown menus in the sidebar to expand Section dropdowns and access specific Blocks, or click the element you need to update in the Live Preview.
- To access the image uploader for the cover image, click Header or click the image behind your profile picture, then click Cover Image.
- To access the image uploader for a single image, expand the dropdown for the Section containing the image Block, then click Image. You can also click the image you need to update in the Live Preview.
- To update a gallery of images, expand the dropdown for the Section containing the Image/Gallery Block, then click Image/Gallery. You can also click any image in the gallery that you need to update in the Live Preview. This will open a menu where you can add, rearrange, or remove images as needed.
- Make the necessary changes, then click Publish Changes to update your live identity profile .
How to upload or update images as a Team Plan manager or administrator
If you’re the owner, administrator, or manager of your company's account, you can update the images on your identity profiles by accessing your OneTapConnect account dashboard.
How to update profile or About Me pictures:
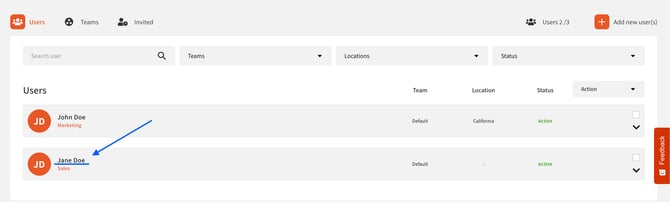
- Go to Users.
- Click the name of the user/identity profile you need to update.
- Click Edit profile information to open a series of forms where you can update that user/identity profile or About Me picture.
- Make the necessary changes, then click Save to update that live identity profile.
How to upload or update other images on your company's identity profiles:
- Go to Templates.
- Click ⋮ on the Template you need to update, then click Edit Template to open the Visual Editor for that Template.
- Use the dropdown menus in the sidebar to expand Section dropdowns and access specific Blocks, or click the element you need to update in the Live Preview.
- To access the image uploader for the cover image, click Header or click the image behind your profile picture, then click Cover Image.
- To access the image uploader for a single image, expand the dropdown for the Section containing the image Block, then click Image. You can also click the image you need to update in the Live Preview.
- To update a gallery of images, expand the dropdown for the Section containing the Image/Gallery Block, then click Image/Gallery. You can also click any image in the gallery that you need to update in the Live Preview. This will open a menu where you can add, rearrange, or remove images as needed.
- Make the necessary changes, then click Publish Changes to update every identity profile that is assigned to that Template.